Déconnecté1 888 344-4424EN






-
Champ d’application
- Tous les produits
- Santé - Sécurité
- Prothèses amovibles
- Tous les produits
- Prise d’empreintes et registres
- Coulée des modèles et MEA
- Reproduction de modèle et prothèse
- Cirage & montage
- Mise en moufle
- Acrylique - Bourrage - Injection
- Échaudage - Cuisson - Démouflage
- Meulage / coupage / sablage
- Adaptation
- Polissage - Finition
- Prothèses sur implants
- Réparations - renforts
- Rebasage & Conditionnement
- Autres matériaux
- Accessoires Bucaux
- Boîtes et emballage
- Meubles
- Prothèses fixes
- Tous les produits
- Coulée des empreintes
- Grossissement
- Fabrication des modèles et MEA
- Cirage, maquettes
- Procédé Céramique
- Tous les produits
- Stratification de céramique
- Lingotins
- Fours et accessoires de cuisson
- Couper - Former - Texturer
- Maquillage et glaçure
- Polissage
- Cimentation et Mordançage
- Procédé Métal
- Procédé Zircone
- Procédé composite
- Mise en revêtement
- Enfournement - Dépouillage
- Adaptation
- Boîtes et emballage
- Pièces squelettiques
- Orthodontie
- Tous les produits
- Fabrication de modèles, mise en articulation
- Reproduction de modèle
- Cirage
- Instruments et équipements
- Pinces pour fils métalliques
- Fils métalliques
- Acryliques Ortho & additifs
- Acryliques pour plaques occlusales
- Thermoplastiques
- Meulage / coupage / sablage
- Polissage - Finition
- Boîtes et emballage
-
Produits
- Tous les produits
- Produits DenPlus
- Acryliques
- Tous les produits
- Résine DenPlus
- Résines à cuisson conventionnelle
- Résine pour cuisson par micro-ondes
- Résine fluide pour coulée
- Résines de réparation
- Résines auto-polymérisables pour porte-empreintes
- Résines pour regarnissage
- Résines orthodontiques
- Résines thermoflexibles
- Résines radiopaques
- Résines teintes de dent
- Abrasifs, Fraises, Polissoirs et Disques
- Tous les produits
- Abrasifs
- Fraises
- Tous les produits
- Mini-catalogue fraises au carbure Diaswiss
- Fraises au carbure pour pièce à main
- Fraises spécialisées
- Fraises au carbure pour moteur
- Fraises pour turbine haute vitesse
- Fraises Infiniti pour pièce à main
- Fraises avec revêtement nitrure de titane
- Fraises DLC (Diamond-Like-Carbon)
- Fraises diamantées électroplaquées
- Fraises diamantées frittées
- Fraises pour finition des bases molles
- Pour technique de fraisage parallèle
- Fraises pour zircone
- Fraises Typhoon
- Organisation fraises
- Disques
- Roues et pointes abrasives, polissoirs
- Tous les produits
- Roues abrasives et pointes pour acryliques
- Roues abrasives et pointes pour zircone
- Roues et pointes d’oxyde d’aluminium
- Roues et pointes en carbure de silicium
- Roues pour meulage sans chaleur (Heatless)
- Meules pour moteur
- Bandes abrasives
- Roues et pointes en polyuréthane
- Roues et pointes en caoutchouc
- Roues et pointes en silicone
- Mandrins
- Roues pour taille-modèle
- Accessoires
- Articulateurs et arcs faciaux
- Brûleurs
- Numérique
- Tous les produits
- Mini-catalogue Numérique
- Logiciels
- Scanners dentaires
- Impression 3D
- Usinage
- Céramiques
- Cires
- Dents
- Die et modèle
- Boîtes et Emballage
- Empreintes
- Tous les produits
- Accessoires pour matériaux d’empreinte
- Polysulfure
- Adhésifs pour porte-empreintes
- Alginates
- Base de caoutchouc
- Bols de mélange
- Enregistrement occlusal
- Pistolet et embouts mélangeurs
- Polyéther
- Porte-empreintes
- Masques gingivaux
- Mastic pour empreintes
- Nettoyants pour alginate
- Seringues pour alginate
- Thermoplastiques - Composés
- Vinyl Polyether Silicone (VPES)
- Vinyl Polysiloxane (VPS)
- Oxyde de zinc - Eugénol & Non-Eugénol
- Équipements
- Tous les produits
- Anti-éclabousseurs
- Bains ultrasoniques
- Balances
- Burins électriques/pneumatiques
- Chauffe-cire
- Clinique
- Collecteurs de poussières
- Détoureuse pour arche
- Échaudeuses pour cire
- Coulée métaux
- Foreuse à goujons
- Fournaises
- Hottes et purificateurs d’air
- Lampes
- Loupes
- Mélangeurs
- Mélangeurs pour hydrocolloïde
- Meuleuses/polisseuse à haute vitesse pour métal
- Micromoteurs - pièces à main
- Microscopes
- Moteurs
- Moulage sous vide
- Nettoyeurs à vapeur
- Nettoyeurs de prothèses
- Équipement à photopolymériser
- Polissoirs
- Pots à pression
- Presse Hydraulique
- Systèmes à injection
- Sableuse
- Spatules chauffantes
- Stérilisateurs
- Taille-modèles
- Trappes et bennes à plâtre
- Turbines haute vitesse
- Unité de soudage
- Unités de cuisson pour prothèse
- Vibreurs
- Instruments
- Matériaux photopolymérisants
- Meubles
- Moulage sous vide
- Orthodontie
- Pinceaux, Brosses et polissoirs
- Plâtres, pierres et revêtements
- Ponts & couronnes
- Prévention et cosmétique
- Produits chimiques
- Prothèses amovibles
- Tous les produits
- Résines pour base dentaire
- Regarnissage de prothèse
- Prothèses partielles
- Accessoires pour prothèses
- Tous les produits
- Caractérisation
- Crochets métalliques
- Crochets en plastique
- Feuilles séparatrices - mise en moufle
- Fibres
- Fils
- Presse à rebasage
- Jauges, Compas, Plan occlusal
- Liquide séparateur
- Matériaux à duplication
- Moufles et brides
- Moufles pour duplication
- Pâte isolante
- Plaques bases
- Polissage
- Treillis et renforts
- Sécurité
- Usage unique
-
Équipements
- Tous les produits
- Anti-éclabousseurs
- Bains ultrasoniques
- Balances
- Burins électriques/pneumatiques
- Chauffe-cire
- Clinique
- Collecteurs de poussières
- Détoureuse pour arche
- Échaudeuses pour cire
- Coulée métaux
- Foreuse à goujons
- Fournaises
- Hottes et purificateurs d’air
- Lampes
- Loupes
- Mélangeurs
- Mélangeurs pour hydrocolloïde
- Meuleuses/polisseuse à haute vitesse pour métal
- Micromoteurs - pièces à main
- Microscopes
- Moteurs
- Moulage sous vide
- Nettoyeurs à vapeur
- Nettoyeurs de prothèses
- Équipement à photopolymériser
- Polissoirs
- Pots à pression
- Presse Hydraulique
- Systèmes à injection
- Sableuse
- Spatules chauffantes
- Stérilisateurs
- Taille-modèles
- Trappes et bennes à plâtre
- Turbines haute vitesse
- Unité de soudage
- Unités de cuisson pour prothèse
- Vibreurs
-
Numérique
- Tous les produits
- Mini-catalogue Numérique
- Logiciels
- Scanners dentaires
- Impression 3D
- Usinage
- Dents
-
Fabricants
- Tous les produits
- 3M ESPE
- American Tooth Industries
- ASA Dental
- Aurelia par Supermax Healthcare Canada
- Bausch
- Beaverstate Dental
- Besqual
- Brewer
- Buffalo Dental
- Canadian Hospital Specialities Ltd
- CMP Industries
- Crosstex
- Dedeco
- DenPlus
- Dental Creations
- Dentalfarm
- Dentsply
- Detax
- Diaswiss
- Dreve
- DTS
- Enbio
- Esma Incorporated
- exocad
- FAG Dentaire
- Flashforge
- Flight Dental Systems
- Foredom Electric
- Garreco
- GC America
- Grobet
- Hager
- Hammacher
- Handler
- Hatho
- Invent Dental
- Isonic
- Kerr
- Keystone Industries
- Kube Innovation
- Lang Dental
- Lascod
- LeoneAmerica
- Malzer Dental
- Mark3
- Meta Dental
- Micrylium
- MPF Brush Co
- Myerson
- Nabertherm
- NK-Optik
- Pac-Dent
- Phare Médica
- Phrozen
- Pi Dental
- Prodont Holliger
- pro3dure medical
- PRO-TECH
- Protechno
- Quatro Air
- Ransom & Randolph
- Ray Foster
- Razertip
- Reliable Corporation
- Renfert
- Saeyang
- Scantist 3D
- Schottlander
- Shenpaz
- Shining 3D
- Song Young
- Synca
- Tapmaster
- Tokuyama Dental
- Uvitron International
- Vacalon
- Vita
- Wells Dental
- Whip Mix
- Winder Research
- Yamahachi Dental
- Yates Motloid
- Yeti
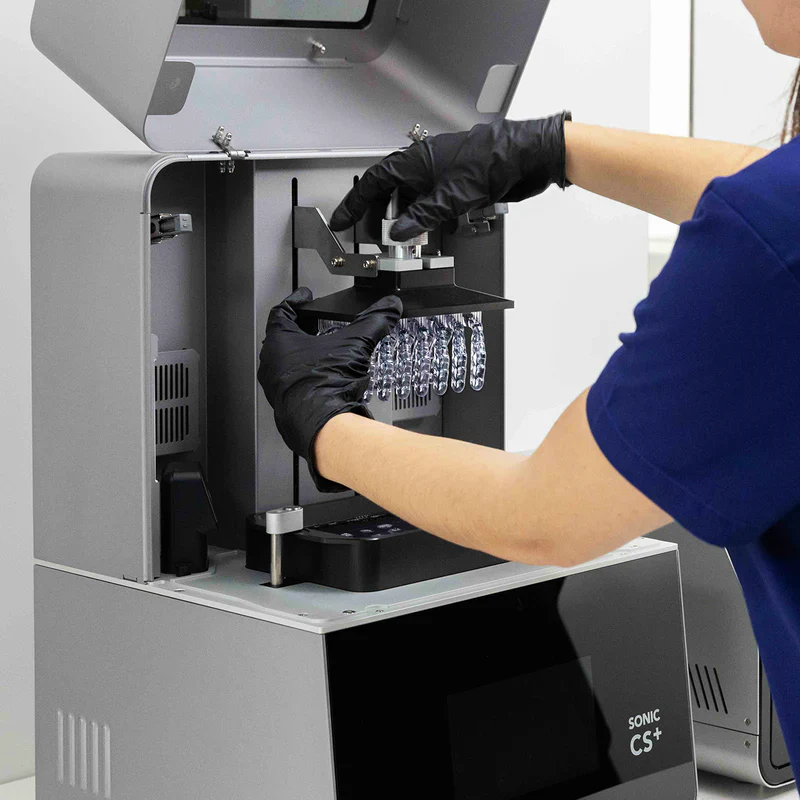
Phrozen Sonic CS+
Votre passerelle vers l'impression 3D au fauteuil

10 minutes de la boîte à l'impression
Parfait même pour les débutants en dentisterie numérique, Sonic CS+ comprend un didacticiel complet pour que vous puissiez commencer à imprimer en 10 minutes.

385 nm Précision supérieure pte;rieure
Produit des faisceaux lumineux plus focalisés et précis pour des résolutions plus élevées et des détails d'impression plus nets.

45 minutes de l'impression au patient
Offrez des soins dentaires en une seule visite avec des appareils dentaires de haute qualité fabriqués en moins de 45 minutes.
Prêt à imprimer en seulement 10 minutes
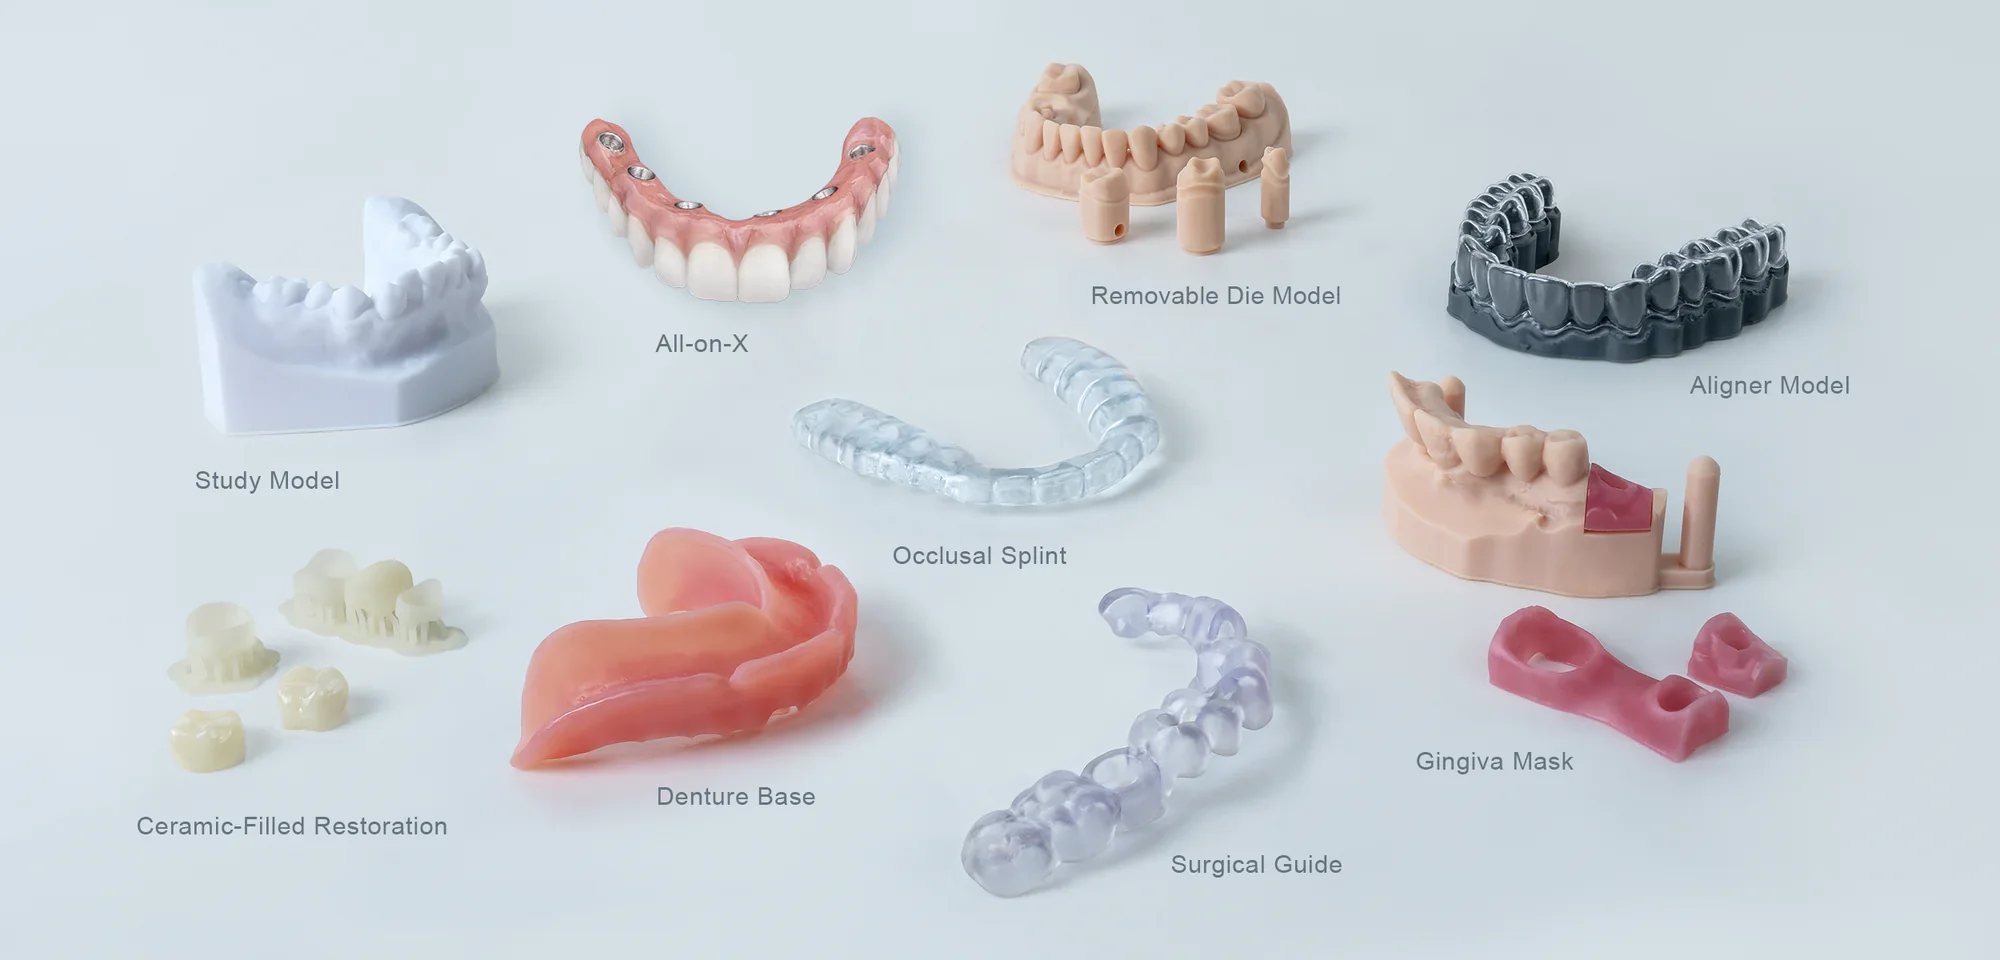
Écran LCD de qualité industrielle 385 nm
La Sonic CS+ est dotée d'un écran LCD de 385 nm conçu pour une précision et une fiabilité supérieures. Grâce à une meilleure pénétration de la lumière par couche, il assure des ajustements précis sur l'arcade pour des résultats constants et de haute qualité : le choix idéal pour vos premiers pas en dentisterie numérique.

Réparation rentable
Coûts de réparation inférieurs par rapport aux imprimantes DLP, offrant une solution économique à long terme.

600 000 à 1,5 M de couches
Optimisé avec des cristaux liquides résistants à la chaleur et un film polarisant à haute transmission UV, l'écran LCD Sonic CS+ est conçu pour durer.

Résolution de 22 µm
Fournit des détails anatomiquement précis avec une grande précision et rapidité.
Détails précis et exceptionnels
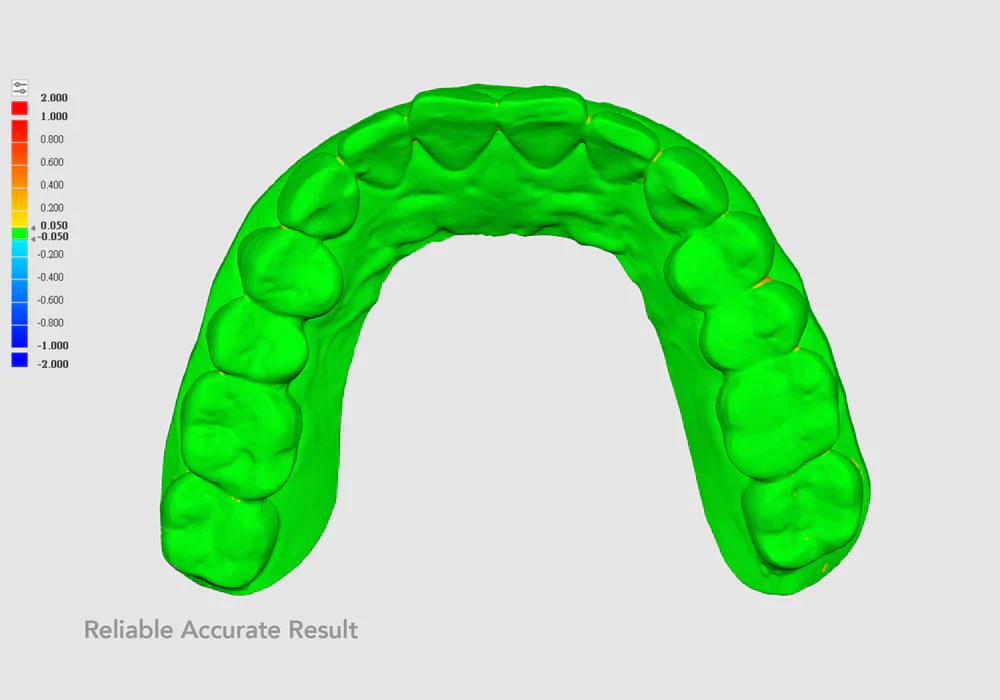
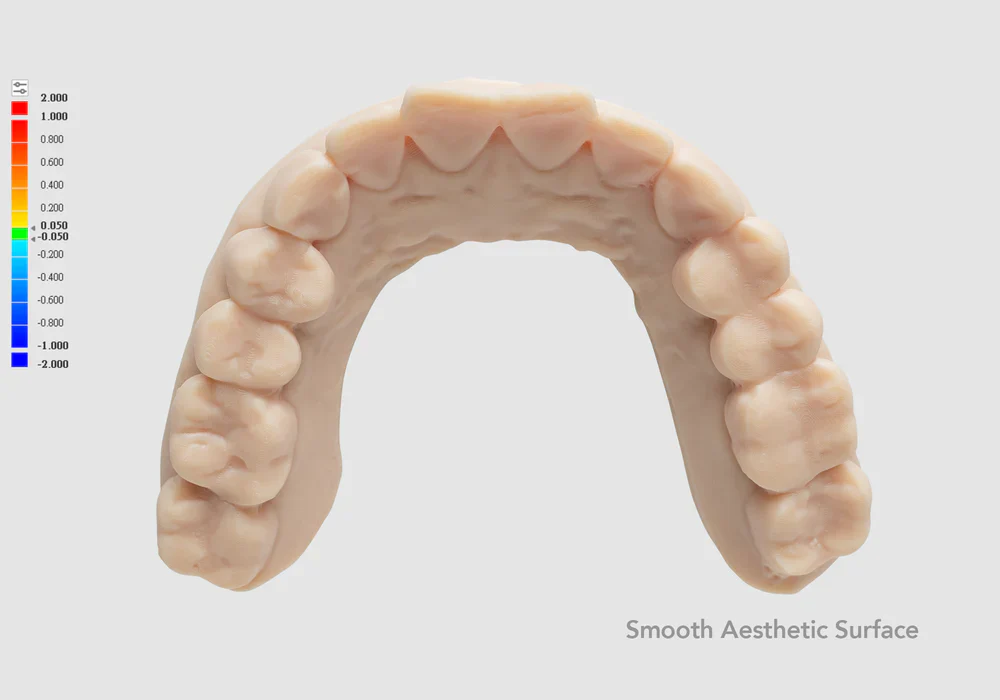
Précision validée avec plus de 95 % de points de données à moins de 50 microns des données CAO d'origine.
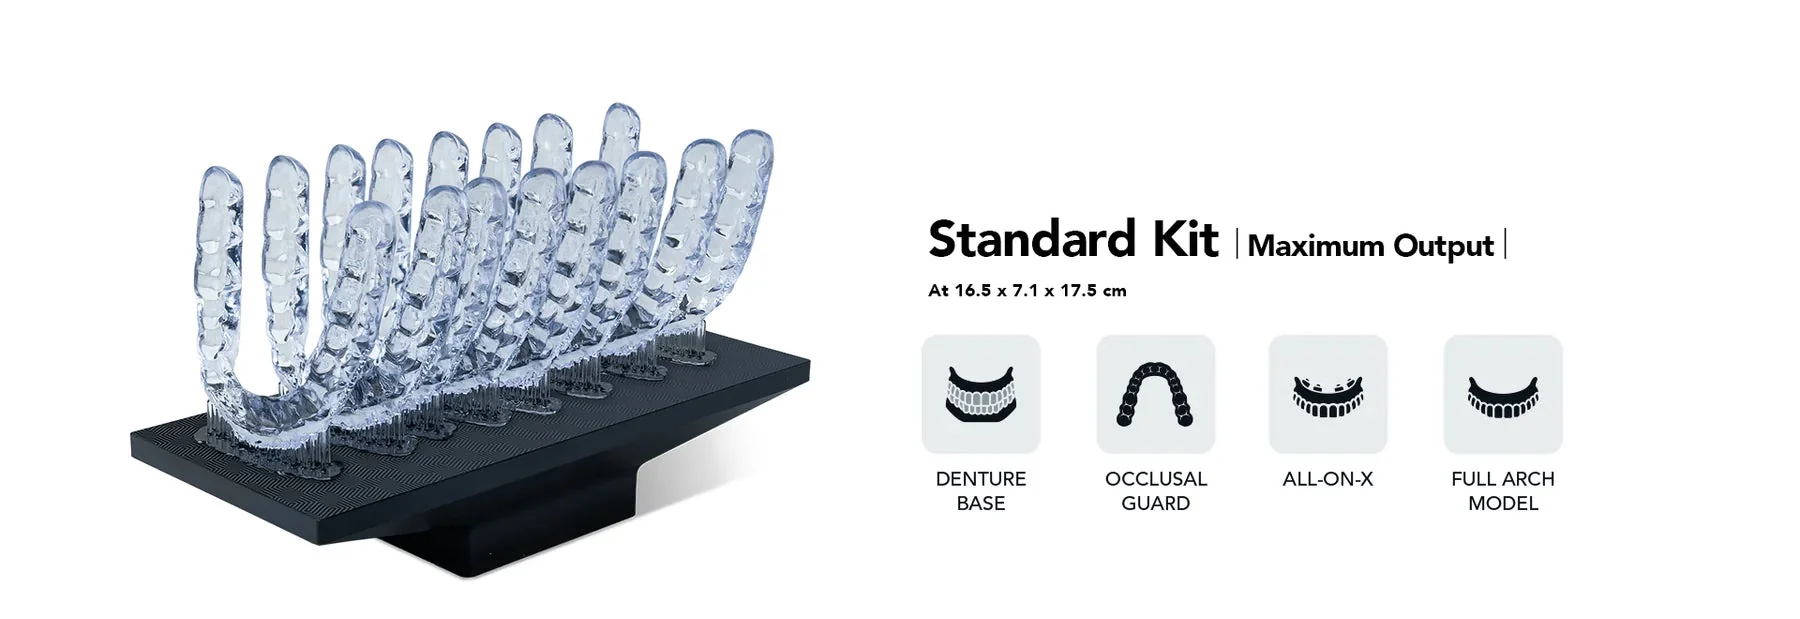
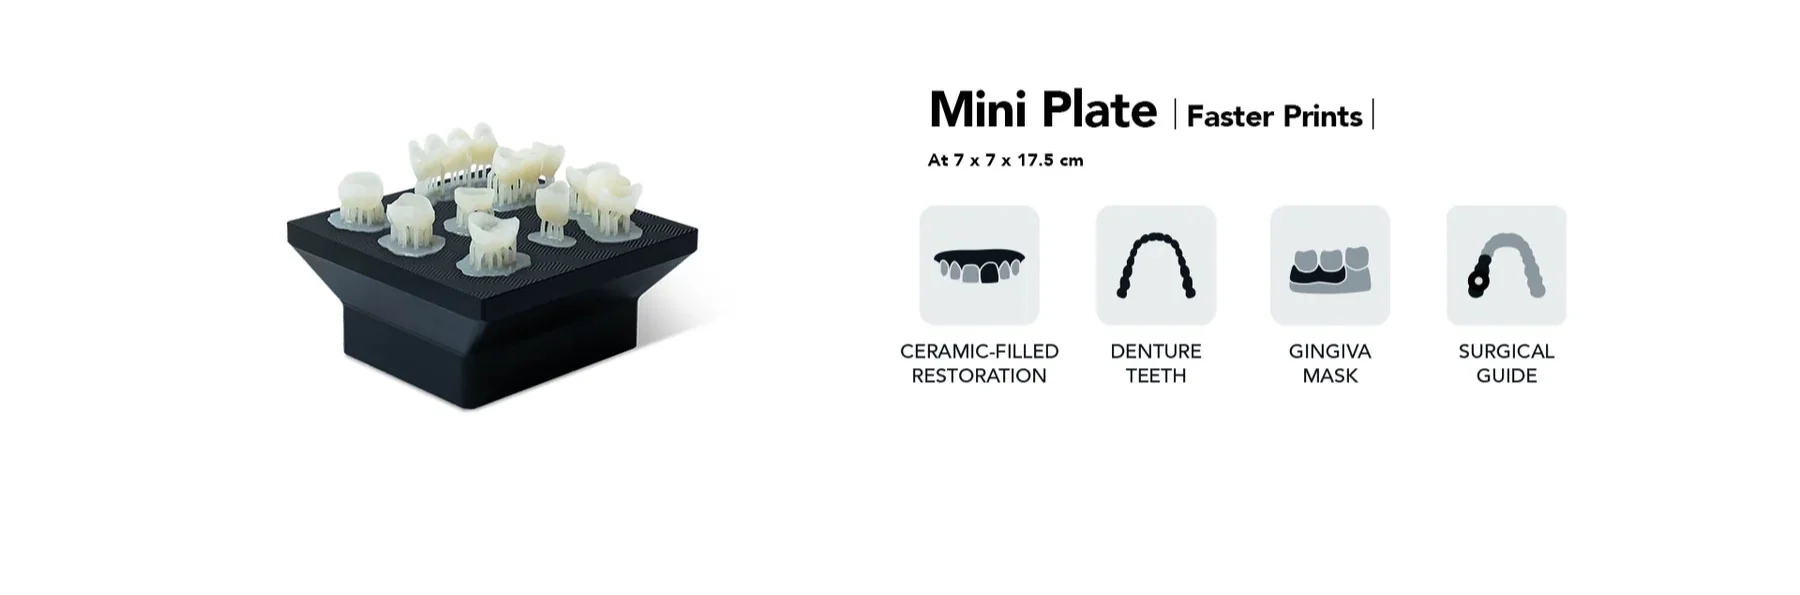
Kit double pour une flexibilité maximale
Conçu pour la polyvalence et l'efficacité, choisissez le Mini Kit pour des impressions plus rapides et un temps de nettoyage réduit, et passez au Kit Standard pour un rendement maximal.
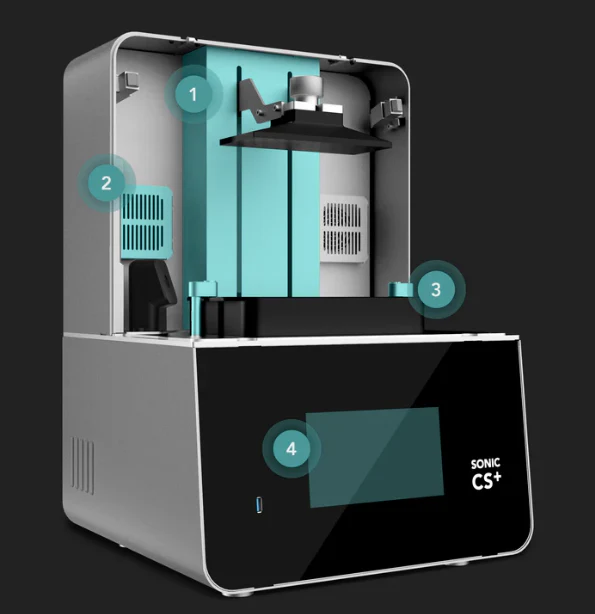
Conception adaptée aux cliniques
- Construction entièrement couverte : empêche la résine d'éclabousser la tige en Z ou de fuir à l'intérieur de votre imprimante.
- Système de purification d'air intégré : réduit l'odeur de résine pendant l'impression.
- Conception de cuve en résine coulissante et verrouillable : plus besoin de visser manuellement.
- Écran tactile large de 7 pouces : naviguez facilement dans votre imprimante avec une visibilité supplémentaire et des boutons moins encombrés.
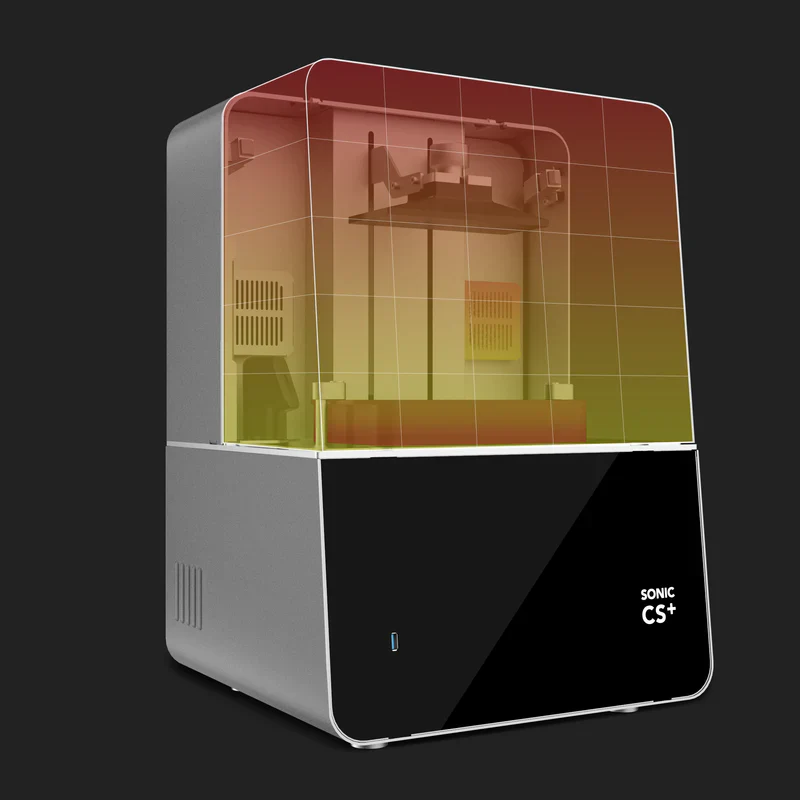
Système de chauffage
Système de chauffage de chambre et de cuve intégré
Flux de travail dentaire numérique simplifié
Étape 1 : Préparation de l'impression
Préparez votre résine pour votre prochaine impression avec Phrozen Heat & Mix et allumez le chauffage de votre imprimante 30 minutes avant de commencer l'impression.
Étape 2 : Numériser et concevoir
Numérisez et concevez vos modèles 3D selon vos besoins.
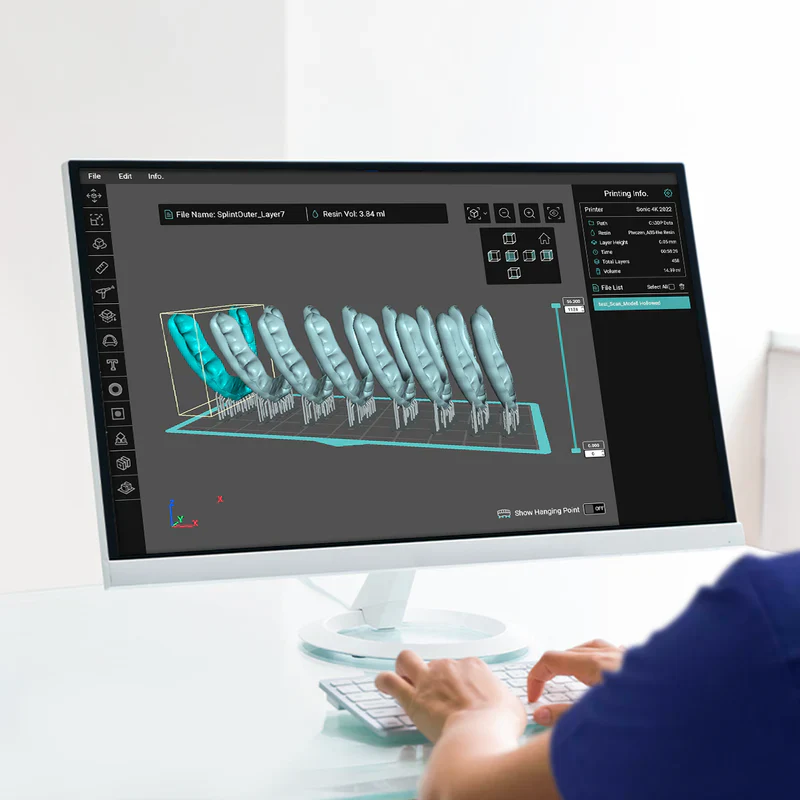
Étape 3 : Tranchage
Utilisez notre DS Slicer alimenté par l'IA pour préparer votre modèle 3D pour l'impression.
Étape 4 : Impression
Grâce à nos paramètres de résine ouverts validés, aucune modification n'est nécessaire. Il vous suffit de cliquer et d'imprimer.
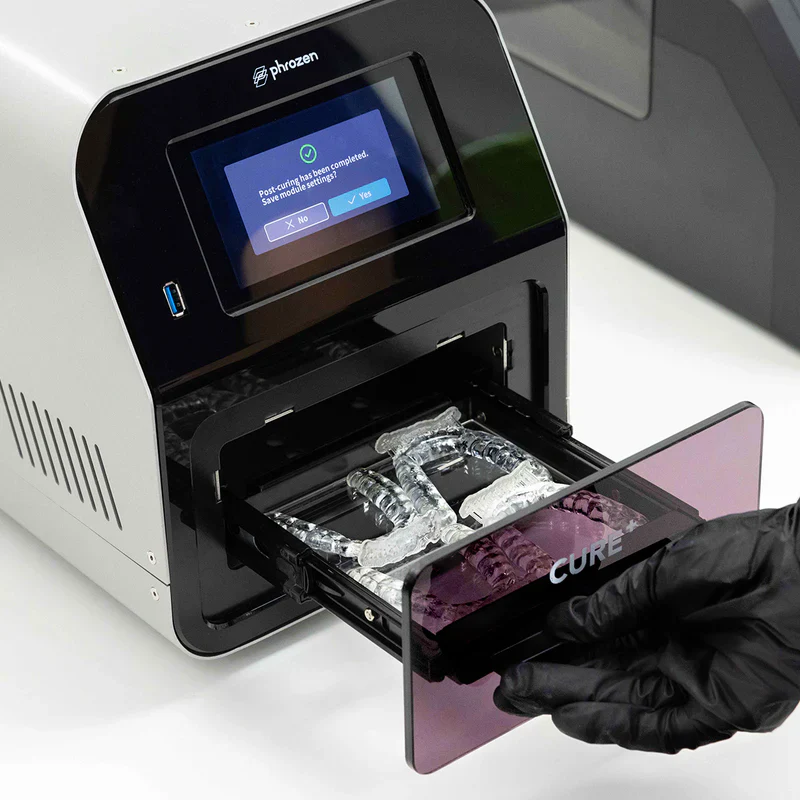
Étape 5 : Post-traitement
Utilisez WASH+ et CURE+ / V-CURE pour compléter votre flux de travail de post-traitement.
Spécifications Sonic CS+
|
Technologie : |
LCD |
|
Résolution XY : |
22 µm |
|
Résolution Z : |
10 µm |
|
Longueur d'onde : |
385 nm |
|
Options de hauteur de couche : |
30μm, 50μm, 100µm |
|
Taille de la machine (cm) : |
36 x 38 x 55 |
|
Volume d'impression (cm) : |
Plaque std: 16.5 X 7.1 X 17.5 cm & mini Plaque: 7 X 7 X 17.5 cm |
|
Vitesse d'impression: |
Jusqu'à 100 mm/heure |
|
Écran tactile : |
7 po |
|
Connectivité: |
USB, Wi-Fi, Ethernet |
|
Plage de température de fonctionnement : |
25±5°C |
|
Type de plaque : |
Aluminium anodisé |
|
Autre système : |
Chauffage intégré, purificateur d'air enfichable |
|
Alimentation : |
Max 240W |
|
Découpage : |
DS Slicer v4.1.0 ou supérieur |
|
Format de fichier: |
.PRZ |
Infolettre
Pour recevoir nos nouvelles et promotions
© 2026 DenPlus Inc. | Copyright | Conception Web : ViGlob